Mecha Agent Inference Client
The Mecha Agent Inference Client is a package that provides a chat UI client you can put into your own web apps so people on the internet can interact and chat with your agents through it.
In this quick tutorial, I’ll walk you through integrating the Inference Client with your existing web app.
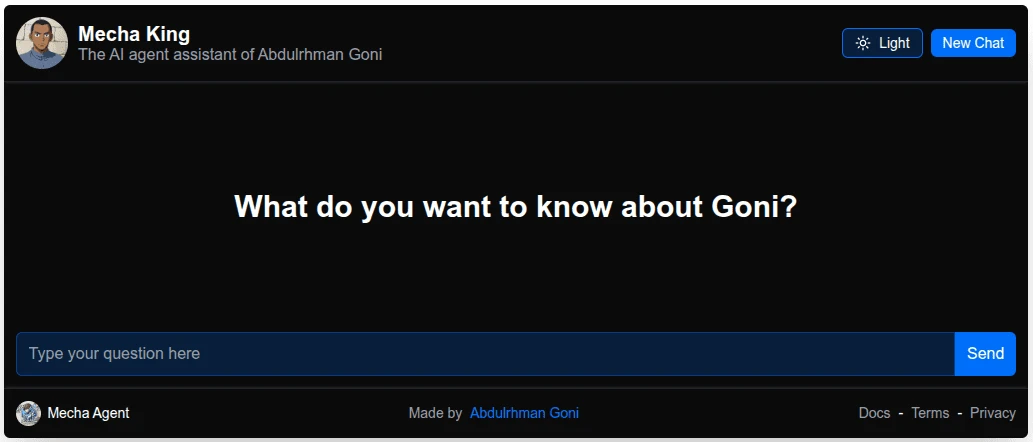
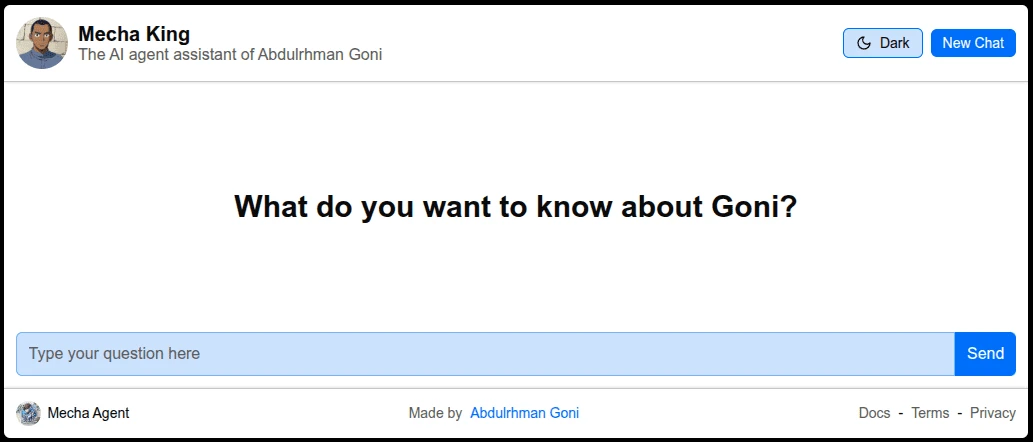
Here is how the Inference Client look 👇
- Dark
- Light
Installation & Setup
We currently support only Next.js and Sveltekit frameworks, So your web app must be built with these frameworks to be able to add the Inference Client into your app.
- CLI
- Manual
With our CLI tool you can easily add The Mecha Agent Inference Client into your project by a single command 👇
- sveltekit
- nextjs
- npm
- pnpm
- yarn
- bun
# omit '-ts' flag if you don't use TypeScript
npx @mecha_agent_inference_client/cli sveltekit -ts
# omit '-ts' flag if you don't use TypeScript
pnpm dlx @mecha_agent_inference_client/cli sveltekit -ts# omit '-ts' flag if you don't use TypeScript
yarn dlx @mecha_agent_inference_client/cli sveltekit -ts# omit '-ts' flag if you don't use TypeScript
bunx @mecha_agent_inference_client/cli sveltekit -ts- npm
- pnpm
- yarn
- bun
# omit '-ts' flag if you don't use TypeScript
npx @mecha_agent_inference_client/cli nextjs -ts
# omit '-ts' flag if you don't use TypeScript
pnpm dlx @mecha_agent_inference_client/cli nextjs -ts# omit '-ts' flag if you don't use TypeScript
yarn dlx @mecha_agent_inference_client/cli nextjs -ts# omit '-ts' flag if you don't use TypeScript
bunx @mecha_agent_inference_client/cli nextjs -tsTo setup the Mecha Agent Inference Client into your project manually you need to install the right package for your framework first.
- sveltekit
- nextjs
- npm
- pnpm
- yarn
- bun
npm install @mecha_agent_inference_client/sveltekitpnpm install @mecha_agent_inference_client/sveltekityarn add @mecha_agent_inference_client/sveltekitbun add @mecha_agent_inference_client/sveltekit- npm
- pnpm
- yarn
- bun
npm install @mecha_agent_inference_client/nextjspnpm install @mecha_agent_inference_client/nextjsyarn add @mecha_agent_inference_client/nextjsbun add @mecha_agent_inference_client/nextjsThen create the API route handler file of the backend side of the Mecha Agent Inference Client in your project
- Next.js
- Sveltekit
import { handler } from "@mecha_agent_inference_client/nextjs";

const routeHandler = handler({ agentId: "..." })

export { routeHandler as GET, routeHandler as POST };
import { handler } from "@mecha_agent_inference_client/sveltekit/server";

export const fallback = handler({ agentId: "..." })
Configuration
Server side handler
The server side route handler function accepts the following options as object: 👇
| Option | Description | default value |
|---|---|---|
| agentId | The ID of the agent you need to set up the interface to chat with | undefined |
| apiKey | The Key to authenticate requests of chatting with a private (not published) agent | undefined |
| serverHost | The URL of the Mecha Agent server (set when self-hosting your own one) | https://mecha-agent.deno.dev |
Getting agent's id
To get your agent's id, Go to /agents page and click on your agent to open it up in its full page,
Then click on the "copy" icon beside your agent's name to copy it's id
Getting an API Key
To bring an API Key, Go to your account in Mecha Agent Platform and navigate to /api-keys page,
Create an API Key there with inference and read permissions, Click on the "Copy" icon beside the Key in API keys table to
copy it.
You have to keep the API Key private by setting it as environment variable
Client side UI
Import the MechaAgentChat component and put it wherever you want in the UI of your project
to have a fully functional chat interface for your agent!.
- Next.js
- Sveltekit
import { MechaAgentChat } from "@mecha_agent_inference_client/nextjs";

<MechaAgentChat /> // Put this somewhere
import { MechaAgentChat } from "@mecha_agent_inference_client/sveltekit";

<MechaAgentChat /> // Put this somewhere
The MechaAgentChat component accepts the following props: 👇
| Prop | Description | default value |
|---|---|---|
| agentId | The ID of the agent you need to set up the interface to chat with (overrides the one set in the server side) | undefined |
| routeHandlerPath | The path to the server side route handler that routes requests to Mecha Agent server | /api/mecha-agent |